Order stepper update
Open an order, adjust quantities or discounts in the stepper, then click Update Order to recalculate totals before regenerating the invoice.
A short, readable summary of the latest DocMaster workflow updates so you can set up faster and avoid common mistakes.
Open an order, adjust quantities or discounts in the stepper, then click Update Order to recalculate totals before regenerating the invoice.
In Google Docs, open the DocMaster popover and click markers like {{customer.name}} to copy or insert them into your template.
Set Output Folder to a dedicated location (for example: Invoices/2026). DocMaster saves PDFs/Docs there and never scans other Drive files.
If a folder is not selected, invoice generation and bulk tasks will be blocked until you choose one.
Complete Tutorial & Guide
Transform your Google Sheet into a Sheets-native CRM + inventory + invoicing system in 10 minutes. Learn smart markers, bulk PDF creation, email automation, inventory tracking, and customer management. No external CRM software required - your data stays in Google Drive and Sheets.

Watch this comprehensive walkthrough to learn everything about DocMaster - from installation to advanced features like email automation, analytics reports, and calendar integration.
DocMaster transforms your Google Sheets into a CRM and inventory system with invoice and quotation automation. No external CRM software required. Your data stays in Google Drive and Sheets with full control and enterprise-grade security.
Install DocMaster once, then open it from the Extensions menu in Google Sheets.
Go to the Google Workspace Marketplace and open the DocMaster listing: https://workspace.google.com/marketplace/app/docmaster_inventory_order_management/530480400615?flow_type=2
Click Install and approve the requested permissions.
In Google Sheets, open Extensions → DocMaster → Open to launch the sidebar.
Create the required tabs, then set a default output folder and confirm your configuration settings.
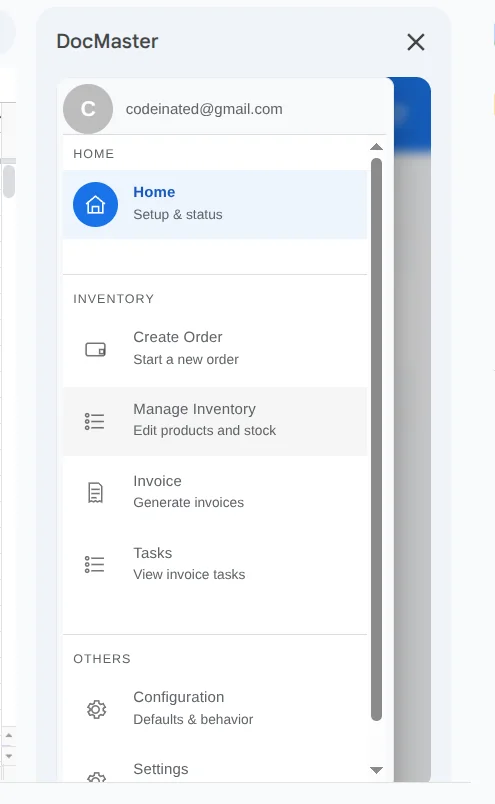
In the sidebar home screen, click 'Initialize sheets' to create the required sheets with proper headers. This creates: Products, Customers, Orders, Order Items, Tasks - Invoices, Task - Invoice Items, Product History, and App Logs.

Confirm all required sheets now exist: Products (inventory), Customers (contact info), Orders (transactions), Order Items (line items), Product History (audit log), Tasks sheets (background jobs), and App Logs (error tracking).

Open Configuration from the sidebar to set default currency, required output folder, invoice templates, file naming patterns, and custom properties. These settings streamline document generation and ensure consistency.
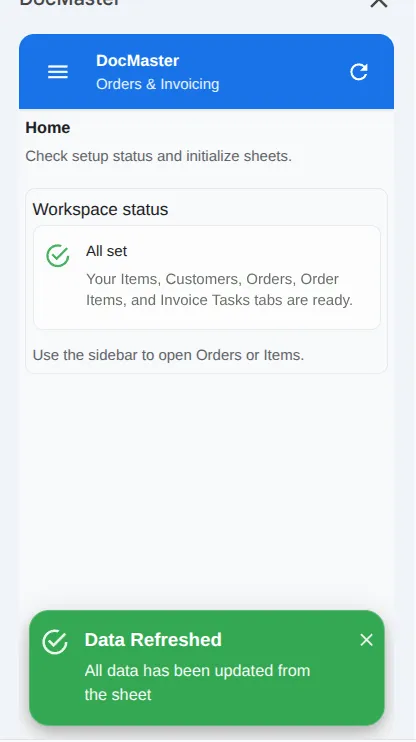
The home screen provides a real-time dashboard with order statistics, low stock alerts, and quick actions. It automatically detects if your workspace needs initialization.
If required sheets are missing, DocMaster shows an initialization prompt. Click 'Initialize sheets' to create Products, Customers, Orders, Order Items, Tasks - Invoices, Task - Invoice Items, Product History, and App Logs sheets with proper headers.
Once initialized, the home screen displays today's orders, pending orders, completed orders, and total revenue with tax breakdown. Order trends show percentage changes compared to yesterday.
Products with stock below the threshold (default: 5 units) are highlighted in the Low Stock alert card. This helps you reorder inventory before running out.
Access common operations directly from the home screen: Create Order, Manage Products, View Product History, and Manage Customers.
Open the drawer from the header to access all features organized in expandable groups: Products (Manage Products, Product History) and Orders (Create Order, Invoice).
Create products, add customers, create orders with line items. All product changes through the UI are automatically tracked in Product History.
In the Products sheet, add each product or service with a unique product ID (for example, PRD-001). You can enter rows manually or use the UI. Using the UI is recommended as it validates IDs and automatically logs changes to Product History.

In the Customers sheet, create customer records with unique IDs. You can enter rows manually, or let customers be created automatically during order creation from the UI.
In the Orders sheet, add a row per order (which can become an invoice or quotation) and reference a valid customer ID. Using the UI is strongly recommended because it applies tax calculations, data mappings, and handles stock deductions automatically.
In the Order Items sheet, add one row per line item referencing the Order ID and Product ID. The UI automatically creates these when you add products to the cart during order creation.
Add and manage products through the UI or directly in Google Sheets. Products can have auto-decreasing stock when used in orders. All product changes are automatically logged in the Product History for audit trails.
Open 'Products' → 'Manage Products' from the sidebar. Enter product ID (must be unique), name, unit price, and tax percentage. Price After Tax is automatically calculated. Enable 'Auto Decrease' if you want stock to reduce automatically when the product is used in orders.
To quickly edit a product: open the Products sheet in Google Sheets, click on any data row, then click 'Load Selected Row from Sheet' in the UI. The form will auto-fill with that product's data for editing.
When 'Auto Decrease' is enabled for a product, creating an order will automatically reduce the stock quantity. For example, if stock is 50 and you order 10 units, stock becomes 40. The stock change is logged in Product History.
You can add or modify products directly in the Products sheet. Follow the column structure and ensure Product IDs remain unique. The UI will refresh automatically when you reload. Note: Direct sheet edits are not tracked in Product History.
Products can be added in the UI or directly in Sheets. Keep IDs stable to preserve history and enable proper audit trails.
| ID | Name | Unit Price | Tax % | Price After Tax | Stock Quantity | Auto Decrease | Created At | Updated At |
|---|---|---|---|---|---|---|---|---|
| ITM-1001 | Retainer (Monthly) | 1200 | 10 | 1320 | 50 | Yes | 2026-01-10 | 2026-01-18 |
Every product change made through the UI is automatically logged with full details. Search, filter, and review all modifications with timestamps and user information.
Open 'Products' → 'Product History' from the sidebar navigation. The history view displays all product changes in a card-based layout with color-coded indicators for different action types.

Use the search bar at the top to find products by name or ID. The search filters in real-time as you type, making it easy to track specific products across all their changes.
Each history card shows the action type (Created, Updated, or Deleted), user email, and timestamp. Click 'View Changes' to expand and see the exact field modifications in a structured format.
For updates, the expanded view shows before/after values for all modified fields. For creations, you'll see all initial values. For deletions, you'll see the final state before removal.
The Product History sheet automatically captures all product changes with complete audit information.
| Timestamp | Product ID | Product Name | Action | User | Changes | Before State | After State |
|---|---|---|---|---|---|---|---|
| 2026-01-23 08:15:42 | PRD-001 | Premium Widget | updated | user@company.com | {"unitPrice": {"old": 100, "new": 120}} | {"id": "PRD-001", "name": "Premium Widget", "unitPrice": 100, ...} | {"id": "PRD-001", "name": "Premium Widget", "unitPrice": 120, ...} |
| 2026-01-23 08:10:15 | PRD-002 | Basic Service | created | admin@company.com | {} | null | {"id": "PRD-002", "name": "Basic Service", "unitPrice": 50, ...} |
Add and manage customer information through the UI or directly in Google Sheets. Customer data is used when creating orders and generating invoices or quotations.
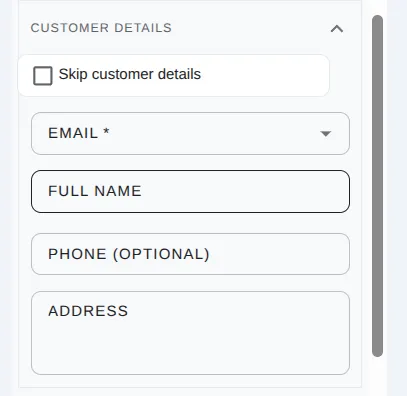
Open 'Manage Users' from the sidebar. Enter customer email (required and must be unique), full name, phone number, and address. The address field supports multiple lines for complete addresses.
When creating orders, use the customer autocomplete field. Type 4 or more characters to search existing customers. If the customer doesn't exist, you can create them on the fly.
To quickly edit a customer: open the Customers sheet in Google Sheets, click on any data row, then click 'Load Selected Row from Sheet' in the UI. The form will auto-fill with that customer's data for editing.
You can also edit customer data directly in the Customers sheet. Add or modify rows following the column structure: Email | Name | Phone | Address | Total Orders | Last Order Date. Total Orders and Last Order Date are automatically calculated.
The Customers sheet tracks all customer information and order history. Email is the unique identifier.
| Name | Phone | Address | Total Orders | Last Order Date | |
|---|---|---|---|---|---|
| john@example.com | John Smith | +1-555-0123 | 123 Main Street Apt 4B New York, NY 10001 | 5 | 2026-01-20 |
| sarah@company.com | Sarah Johnson | +44-20-1234-5678 | 45 Baker Street London, UK | 12 | 2026-01-22 |
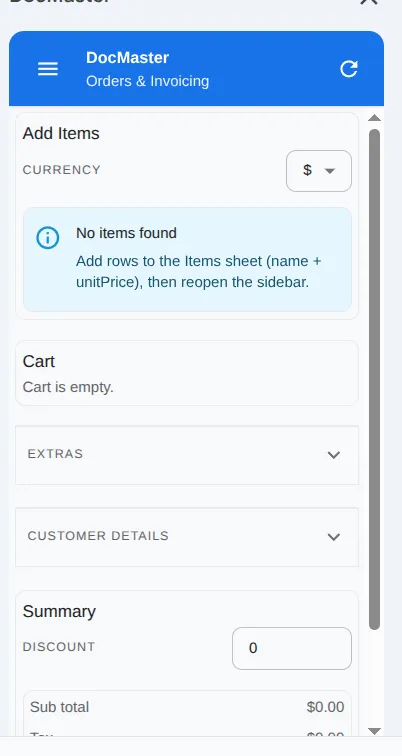
Orders behave like a cart system. Use the stepper to create or update orders so totals, taxes, and stock changes stay consistent.
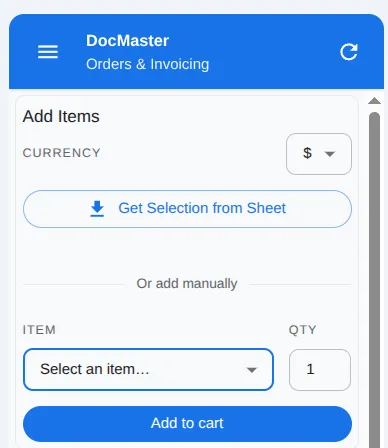
Click Create Order, or open an existing order and choose Update Order to load the stepper with current values.
Select products from the dropdown, set quantities, and click Add to cart. The app calculates product prices and taxes as items are added. If a product has 'Auto Decrease' enabled, stock will be reduced when the order is created.
Add shipping, packing, or restoration charges. Apply a flat discount if needed.
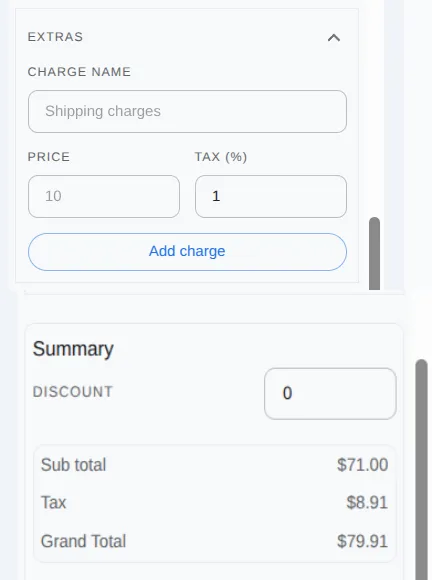
Pick a customer email from the existing list to avoid duplicates.
Confirm totals, taxes, and item counts, then click Create Order or Update Order to apply changes.
These fields are calculated or written during order creation and document generation (invoices or quotations).
| ID | Order Number | Status | Customer ID | Notes | Currency Code | Currency Symbol | Subtotal | Tax Total | Discount Amount | Grand Total | Items Count | Document URL | Document Folder URL | Created By | Created At | Updated At |
|---|---|---|---|---|---|---|---|---|---|---|---|---|---|---|---|---|
| ORD-2026-001 | INV-2026-001 | Ready | CUST-0001 | Monthly retainer | USD | $ | 1200 | 120 | 0 | 1320 | 2 | https://docs.google.com/... | https://drive.google.com/... | user@company.com | 2026-01-18 | 2026-01-18 |
Process refunds for orders while automatically restoring product inventory. DocMaster handles inventory adjustments and sends refund confirmation emails.
In the Orders section, click on the order you want to refund. The order details panel will open on the right side.
At the bottom of the order details panel, click the 'Refund Order' button. A confirmation dialog will appear explaining that the order status will change to 'Refunded' and inventory will be restored.

Review the refund details and click 'Confirm' to process. DocMaster will: (1) Change order status to 'Refunded', (2) Restore product stock quantities, (3) Send refund confirmation email if enabled.
Go to Products section to verify that stock quantities have been increased by the refunded amounts. Check Email History to confirm the refund email was sent to the customer.
DocMaster performs multiple actions automatically when you process a refund.
| Action | Description | Example |
|---|---|---|
| Status Change | Order status changes to 'Refunded' | Fulfilled → Refunded |
| Inventory Restore | Product stock increased by order quantities | Product A: 50 → 52 units |
| Email Notification | Refund confirmation sent to customer (if enabled) | Email with order details |
| History Log | Refund recorded in order history | Timestamp and user recorded |
| Calendar Cleanup | Associated calendar events removed (if any) | Fulfillment reminder deleted |
Create fulfillment reminder events in your Google Calendar automatically when orders reach specific statuses. Never miss a delivery deadline.
Go to Configuration → Calendar Integration and toggle 'Enable Calendar Events'. You'll be prompted to grant Google Calendar permissions on first use.
Select which order status should trigger calendar event creation. Common choice is 'Confirmed' - when you confirm an order, a calendar reminder is created.
Choose how many days before fulfillment to receive the reminder (e.g., 2 days before). Set the time of day for the event (e.g., 9:00 AM). Events will appear in your primary Google Calendar.
When an order reaches the configured status, DocMaster automatically creates a calendar event with order details: customer name, order number, products, and total amount. The event includes a direct link to the order.
Information included in automatically created calendar events.
| Field | Content | Example |
|---|---|---|
| Event Title | Order fulfillment reminder with customer name | Fulfill Order for John Smith |
| Description | Order details: products, quantities, total | Order #ORD-2026-001: 2x Product A, Total: $150 |
| Date/Time | Calculated from reminder days before fulfillment | January 20, 2026 9:00 AM |
| Location | Customer shipping address (if available) | 123 Main St, City, State |
| Link | Direct link to open order in DocMaster | Opens order details panel |
| Reminder | Email reminder 30 minutes before event | Email notification |
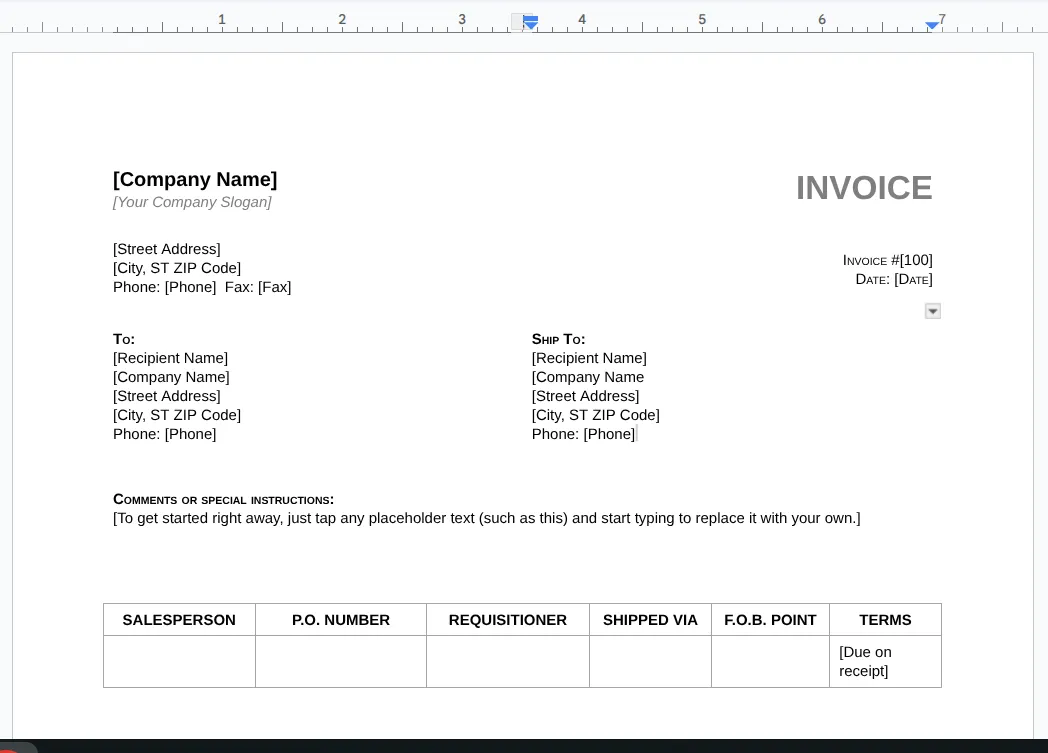
Create a Google Docs template, insert markers with the Docs popover, then preview invoices or quotations before bulk runs.
In Google Docs, build an invoice or quotation template and add your branding and layout.
In Google Docs, open the DocMaster sidebar to browse markers. Click any marker to copy or insert its scriptlet into the template.

Paste markers like {{customer.name}} and {{invoice.total}} in the right places. Always cross-check markers—most errors happen due to incorrect marker names or formatting.
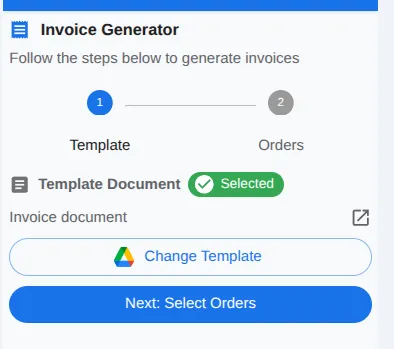
In the Google Sheets DocMaster sidebar, choose the template you just added markers to, then save your selection so that document is used for processing.
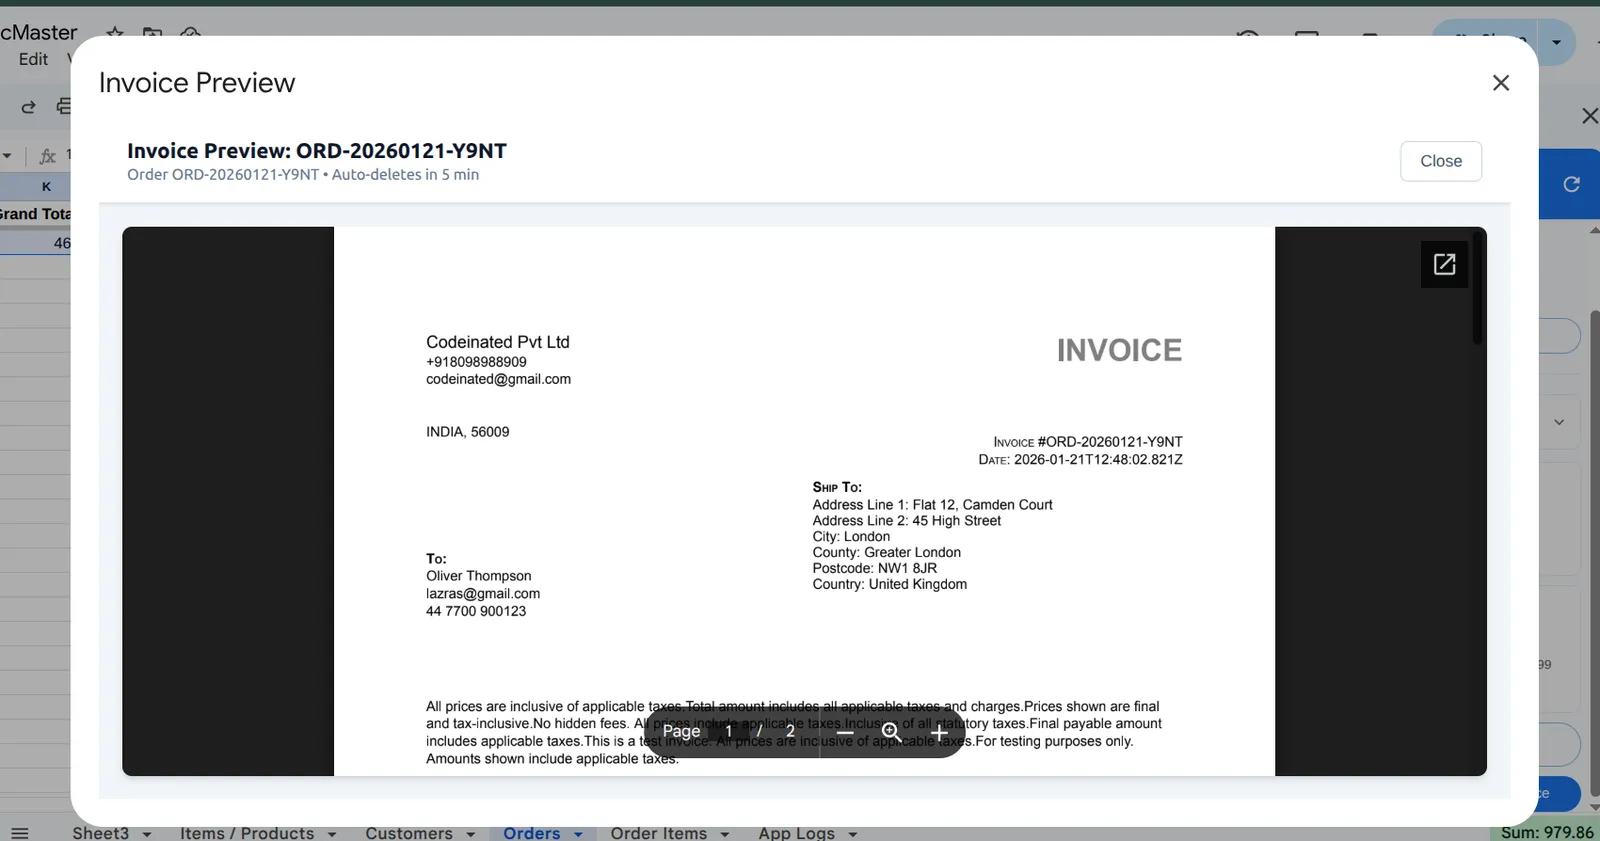
Select an order and click Preview Invoice (or Preview Quotation) to verify output before bulk generation.
Choose a required destination folder for generated documents (invoices and quotations). DocMaster only writes files to this folder.
From the sidebar, select Choose Folder to open the Google Drive picker. This step is required before any invoice generation.
Pick a folder you own or have edit access to, then confirm selection. DocMaster will store all generated files here.
DocMaster stores the folder in your user properties for future runs and uses it for all document generation.
Markers are tokens inside your template that DocMaster replaces with data from Sheets. Use the Docs popover to copy marker scriptlets quickly.
| Category | Marker | What it renders |
|---|---|---|
| Customer | {{customer.name}} | Customer name |
| Order | {{order.id}} | Order ID |
| Dates | {{order.date}} | Order date |
| Totals | {{invoice.total}} | Document total (invoice/quote) |
| Line items | {{items.table}} | Line item table block |
Example template snippet
Document #: {{invoice.number}}
Customer: {{customer.name}}
Date: {{order.date}}

{{items.table}}

Subtotal: {{invoice.subtotal}}
Tax: {{invoice.tax}}
Total: {{invoice.total}}Namespaces prevent ambiguity. Use the right namespace for each entity.
| Namespace | Entity | Example fields |
|---|---|---|
| customer | Customer | name, email, phone, address |
| order | Order | orderNumber, status, subtotal, grandTotal |
| lineItem | Line item | itemId, name, quantity, unitPrice |
| config | Config | COMPANY_NAME, PHONE, ADDRESS |
Modifiers transform values using a pipe syntax inside the marker.
| Modifier | Example | Result |
|---|---|---|
| uppercase | {{customer.name | uppercase}} | JOHN DOE |
| lowercase | {{customer.email | lowercase}} | john@example.com |
| capitalize | {{customer.name | capitalize}} | John doe |
| trim | {{customer.phone | trim}} | 555-1234 |
| truncate | {{customer.name | truncate:10}} | John Doe |
| multiply | {{order.total | multiply:0.8}} | 80.00 |
| divide | {{order.total | divide:2}} | 50.00 |
| add | {{order.subtotal | add:10}} | 110.00 |
| subtract | {{order.total | subtract:5}} | 95.00 |
| round | {{order.total | round:2}} | 100.55 |
| abs | {{order.discount | abs}} | 10.00 |
| currency | {{order.total | currency:USD}} | $100.00 |
| number | {{order.total | number:2}} | 100.50 |
| percent | {{lineItem.taxPercent | percent}} | 15% |
| date | {{order.Created At | date:DD/MM/YY}} | 20/01/26 |
| default | {{customer.phone | default:N/A}} | N/A |
These rules keep templates safe, reliable, and predictable.
Bulk document generation (invoices or quotations) runs through a task queue to stay within Apps Script limits.
All background tasks are logged with their status, folder URL, and any failure reason so you can track progress and fix issues gracefully.
Use these statuses to triage runs and retries.
| Status | Meaning |
|---|---|
| Queued | Ready to process |
| In Progress | Currently running |
| Done | Completed successfully |
| Failed | Stopped due to error |
DocMaster stores user preferences and operational metadata in Apps Script properties.
| Property | Scope | Purpose |
|---|---|---|
| DM_CONFIGURATION | User | Add-on settings and defaults |
| DRIVE_PICKER_SELECTION | User | Selected template and output folder |
| SCRIPT_PROPERTIES | Script | Trigger IDs for background tasks |
DocMaster can automatically send professional email notifications to customers when order statuses change. Configure which emails to send and customize email templates.
Go to Configuration and toggle 'Enable Order Emails'. This activates the email automation system.
Choose which order status changes should trigger emails: Pending, Payment Received, Confirmed, Fulfilled, Cancelled, or Refunded. Enable 'Attach Invoice Links' to include invoice PDFs in emails.
Click 'Email Templates' in the sidebar to customize the subject and body for each status. Use markers like {{customerName}}, {{orderNumber}}, {{grandTotal}} to personalize emails. The {{invoiceLink}} marker inserts a professional 'View Invoice' button.
When you update an order status (e.g., from Pending to Confirmed), DocMaster automatically sends the configured email to the customer. Check Email History in the sidebar to see sent emails and delivery status.
Available markers for personalizing email templates. All markers are replaced with actual data when emails are sent.
| Marker | Description | Example Output |
|---|---|---|
| {{customerName}} | Customer's full name | John Smith |
| {{customerEmail}} | Customer's email address | john@example.com |
| {{orderNumber}} | Human-readable order ID | ORD-2026-001 |
| {{orderDate}} | Order creation date | January 18, 2026 |
| {{grandTotal}} | Order total with currency | $1,250.00 |
| {{subtotal}} | Order subtotal before tax | $1,200.00 |
| {{taxTotal}} | Total tax amount | $50.00 |
| {{discountAmount}} | Discount applied | $100.00 |
| {{status}} | Current order status | Confirmed |
| {{invoiceLink}} | Styled 'View Invoice' button | <button style='...'>View Invoice</button> |
| {{config.propertyKey}} | Custom configuration property | Your custom value |
View all emails sent by DocMaster, check delivery status, and resend failed emails.
Click 'Email History' in the sidebar to see all sent emails. The list shows recipient, subject, status (Sent/Failed), timestamp, and order reference.
Green checkmark indicates successful delivery. Red X means the email failed. Click on any email to see full details including error messages for failed sends.
If an email fails (e.g., invalid recipient address), fix the issue and use the 'Resend' button to retry delivery. DocMaster logs all retry attempts.
Receive automated daily or weekly email reports with key business metrics: revenue, orders, top products, and customer insights.
Go to Configuration → Analytics Reports and toggle 'Enable Daily Report'. Set the hour to send (0-23, default 8 AM). Add recipient email addresses (comma-separated for multiple recipients).
Toggle 'Enable Weekly Report' and choose the day of the week (0=Sunday, 6=Saturday, default 1=Monday). Weekly reports provide 7-day summaries with trend comparisons.
After enabling reports, click 'Setup Report Triggers' to activate automated delivery. DocMaster creates time-based triggers in your Google Apps Script project.
Use 'Test Daily Report' or 'Test Weekly Report' buttons to send a sample report immediately. This helps verify your configuration before waiting for scheduled delivery.
Each analytics report includes comprehensive business metrics automatically calculated from your orders data.
| Metric | Description | Calculation Period |
|---|---|---|
| Total Revenue | Sum of all completed order totals | Daily/Weekly |
| Order Count | Number of orders created | Daily/Weekly |
| Average Order Value | Revenue ÷ Order count | Daily/Weekly |
| Top Products | Best-selling products with quantities | Daily/Weekly |
| Top Customers | Highest spending customers | Daily/Weekly |
| Status Breakdown | Orders by status (Pending, Confirmed, etc.) | Daily/Weekly |
| Fulfillment Rate | Percentage of fulfilled orders | Daily/Weekly |
| Revenue by Currency | Total revenue split by currency | Daily/Weekly |
DocMaster automatically generates professional PDF invoices when you create orders. No manual invoice creation needed.
When you create a new order (whether from the 'Create Order' button or by adding products to cart), DocMaster automatically generates a PDF invoice and stores it in Google Drive.
In the Orders section, click any order to open details. Click the 'View Invoice' button to open the PDF invoice in a new tab. The invoice includes all order details, line items, taxes, discounts, and custom properties.

When order emails are enabled, invoices are automatically attached as links in customer emails. The {{invoiceLink}} marker in email templates renders as a styled 'View Invoice' button.
If you update order details (products, quantities, discounts), use the 'Regenerate Invoice' button in order details to create a new PDF with updated information. The old invoice is replaced in Drive.
Follow this sample data set to see how a single order turns into a finished invoice or quotation.
Before (Orders)
| Order ID | Customer ID | Order Date | Status |
|---|---|---|---|
| ORD-2026-001 | CUST-0001 | 2026-01-15 | Ready |
After (Invoices)
| Document ID | Order ID | Doc Link | Status |
|---|---|---|---|
| INV-2026-001 | ORD-2026-001 | https://docs.google.com/... | Sent |
Get answers to common questions about automating invoice and quotation generation in Google Sheets with DocMaster.
Most issues are caused by missing IDs or mismatched markers.
Operational shortcuts that keep large document generation runs clean.